library 추가 필요
[libs.version.toml]
[versions]
//...
constaraintLayoutVersion = "1.1.0"

[libraries]
//...
androidx-constraint-layout = { group = "androidx.constraintlayout", name = "constraintlayout-compose", version.ref = "constaraintLayoutVersion" }

[plugins]
//...
createRefs()
- constraintLayout 안에 있는 여러 UI 요소(예: 버튼, 텍스트 등)를 서로 연결하고 배치할 수 있는 참조를 생성
@Stable
fun createRefs(): ConstraintLayoutScope.ConstrainedLayoutReferences =
    referencesObject ?: ConstrainedLayoutReferences().also { referencesObject = it }
ConstrainedLayoutReferences를 보면 총 16개까지의 제약 조건을 설정가능, 16개 이상이 필요하면 여러번 호출하면 된다
inner class ConstrainedLayoutReferences internal constructor() {
    operator fun component1(): ConstrainedLayoutReference = createRef()

    operator fun component2(): ConstrainedLayoutReference = createRef()

    operator fun component3(): ConstrainedLayoutReference = createRef()

    operator fun component4(): ConstrainedLayoutReference = createRef()

    operator fun component5(): ConstrainedLayoutReference = createRef()

    operator fun component6(): ConstrainedLayoutReference = createRef()

    operator fun component7(): ConstrainedLayoutReference = createRef()

    operator fun component8(): ConstrainedLayoutReference = createRef()

    operator fun component9(): ConstrainedLayoutReference = createRef()

    operator fun component10(): ConstrainedLayoutReference = createRef()

    operator fun component11(): ConstrainedLayoutReference = createRef()

    operator fun component12(): ConstrainedLayoutReference = createRef()

    operator fun component13(): ConstrainedLayoutReference = createRef()

    operator fun component14(): ConstrainedLayoutReference = createRef()

    operator fun component15(): ConstrainedLayoutReference = createRef()

    operator fun component16(): ConstrainedLayoutReference = createRef()
}
val (first, second, third) = createRefs()

Box(
    modifier = Modifier.size(40.dp)
        .background(Color.Red)
        .constrainAs(first) {//box가 어디에 위치해야할지 랜더링
            bottom.linkTo(parent.bottom)
        }
)
이 예시로 본다면
Box는 first가 되며 box의 bottom은 parent의 bottom에 연결된다
기존의 constraintBottomToBottom="parent"의 의미
fun linkTo(
    anchor: ConstraintLayoutBaseScope.HorizontalAnchor,
    margin: Dp = 0.dp,
    goneMargin: Dp = 0.dp
)
linkTo는 위와 같이 margin, goneMargin 값도 설정 가능하다
ConstraintLayout( modifier = Modifier.fillMaxSize()) {
     // 여러개의 reference return
    val (first, second, third) = createRefs()

    Box(
        modifier = Modifier.size(40.dp)
            .background(Color.Red)
            .constrainAs(first) {//box가 어디에 위치해야할지 랜더링
                top.linkTo(parent.top, margin = 8.dp)
            }
    )

    Text(
        text = "second Text",
        modifier = Modifier.constrainAs(second) {
            top.linkTo(first.bottom)
        }
    )
}
linkTo는 꼭 parent에 붙는게 아니다 (xml에서의 constraint를 생각할 것)

가운데 정렬은 기존의 constraint에서와 달리
centerTo(ref), centerVerticallyTo(ref), centerHorizontallyTo(ref)로 사용 가능
Text(
    text = "second Text",
    modifier = Modifier.constrainAs(second) {
        centerTo(parent)
    }
)
Chain
이렇게 3개의 ref를 선언한 후
val (first, second, third) = createRefs()

Box(
    modifier = Modifier.size(40.dp)
        .background(Color.Red)
        .constrainAs(first) {

        }
)

Box(
    modifier = Modifier.size(40.dp)
        .background(Color.Cyan)
        .constrainAs(second) {

        }
)

Box(
    modifier = Modifier.size(40.dp)
        .background(Color.Black)
        .constrainAs(third) {

        }
)
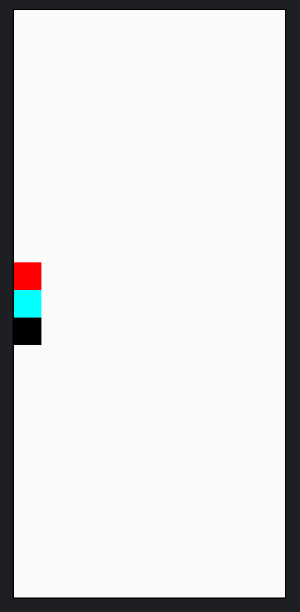
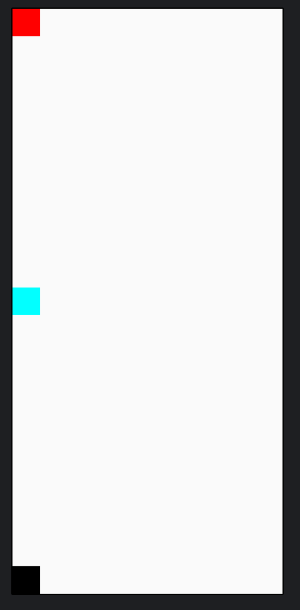
createVerticalChain(first, second, third)수직으로 3가지 ref의 체인을 생성하면 동일한 간격으로 수평 체인이 생성됩니다

param으로 ChainStyle을 지정할 수 있는데 (Packed, Spread(default), SpreadInside)
createVerticalChain(first, second, third, chainStyle = ChainStyle.Packed)

Packed
- 뷰들이 서로 가까이 모여서 배치
- 체인 내의 뷰들은 중앙에 위치하며, 남는 공간은 양쪽에 균등하게 분배
Spread
- 뷰들이 체인 내에서 가능한 한 멀리 떨어져 배치
- 체인 내의 뷰들은 양쪽 끝에 위치하고(끝 사이에 공백있음), 남는 공간은 뷰들 사이에 균등하게 분배
SpreadInside
- 이 스타일은 Spread와 유사하지만, 체인의 양 끝에 있는 뷰는 끝에 고정되고, 나머지 뷰들 사이에만 간격이 균등하게 분배
- 즉, 체인 내의 첫 번째와 마지막 뷰는 끝에 위치하고, 중간 뷰들 사이에만 간격 생김
Barrier
- 여러 뷰의 경계를 기준으로 제약 조건 설정
- Barrier는 수평 또는 수직 방향으로 설정 가능

val (first, second, third, txt) = createRefs()

Box(
    modifier = Modifier.size(40.dp)
        .background(Color.Red)
        .constrainAs(first) {
            top.linkTo(parent.top)
        }
)

Box(
    modifier = Modifier.size(40.dp)
        .background(Color.Cyan)
        .constrainAs(second) {
            top.linkTo(parent.top)
        }
)

Box(
    modifier = Modifier.size(40.dp)
        .background(Color.Black)
        .constrainAs(third) {
            top.linkTo(parent.top, margin = 32.dp)
        }

)

createHorizontalChain(first, second, third, chainStyle = ChainStyle.SpreadInside)

val barrier = createBottomBarrier(first, second, third)

Text(" barrier 위치를 잘 보세요",
    modifier = Modifier.constrainAs(txt) {
        top.linkTo(barrier)
        end.linkTo(parent.end)
    }
)
이렇게 한다면 margin이 적용된 third의 bottom을 기준으로 barrier가 생긴다

ConstraintSet
- 제약 조건을 modifier에서 선언하지 않고 ConstraintSet을 선언해 밖으로 빼내는 방법
    val constraintSet = ConstraintSet { //여기서 제약 설정
        val box = createRefFor("box")
        val txt = createRefFor("txt")

        constrain(box) {
            top.linkTo(parent.top, margin = 8.dp)
        }

        constrain(txt) {
            centerTo(parent)
        }
    }

    ConstraintLayout(modifier = Modifier.fillMaxSize(), constraintSet = constraintSet) {
        Box(
            modifier = Modifier.size(40.dp)
                .background(Color.Red)
                .layoutId("box")
//                .constrainAs(first) {
//                    top.linkTo(parent.top, margin = 8.dp)
//                }
        )

        Text(
            text = "second Text",
            modifier = Modifier
                .layoutId("txt")
//            modifier = Modifier.constrainAs(second) {
//                centerTo(parent)
//            }
        )
    }
1️⃣ ConstraintSet 선언 createRefFor(id)를 통해 식별자 생성
2️⃣ Constrain(원하는 ref) { 원하는 제약 조건 설정 }
3️⃣ ConstraintLayout에 param으로 ConstraintSet 선언
4️⃣ ConstraintLayout에서 원하는 제약 조건이 필요한 곳에 Modifier의 layoutId에 ConstraintSet에서 설정한 id를 설정
레이아웃 구조가 복잡해지면 ConstraintSet으로 빼내는 게 더 좋을 거 같다
'🤖 Compose' 카테고리의 다른 글
| [Compose] State, StateHoisting (0) | 2025.01.07 |
|---|---|
| [Compose] Snackbar (0) | 2025.01.07 |
| [Compose] Recomposition (0) | 2025.01.06 |
| [Compose] scaffold (0) | 2025.01.06 |
| [Compose] Slot API (0) | 2025.01.06 |