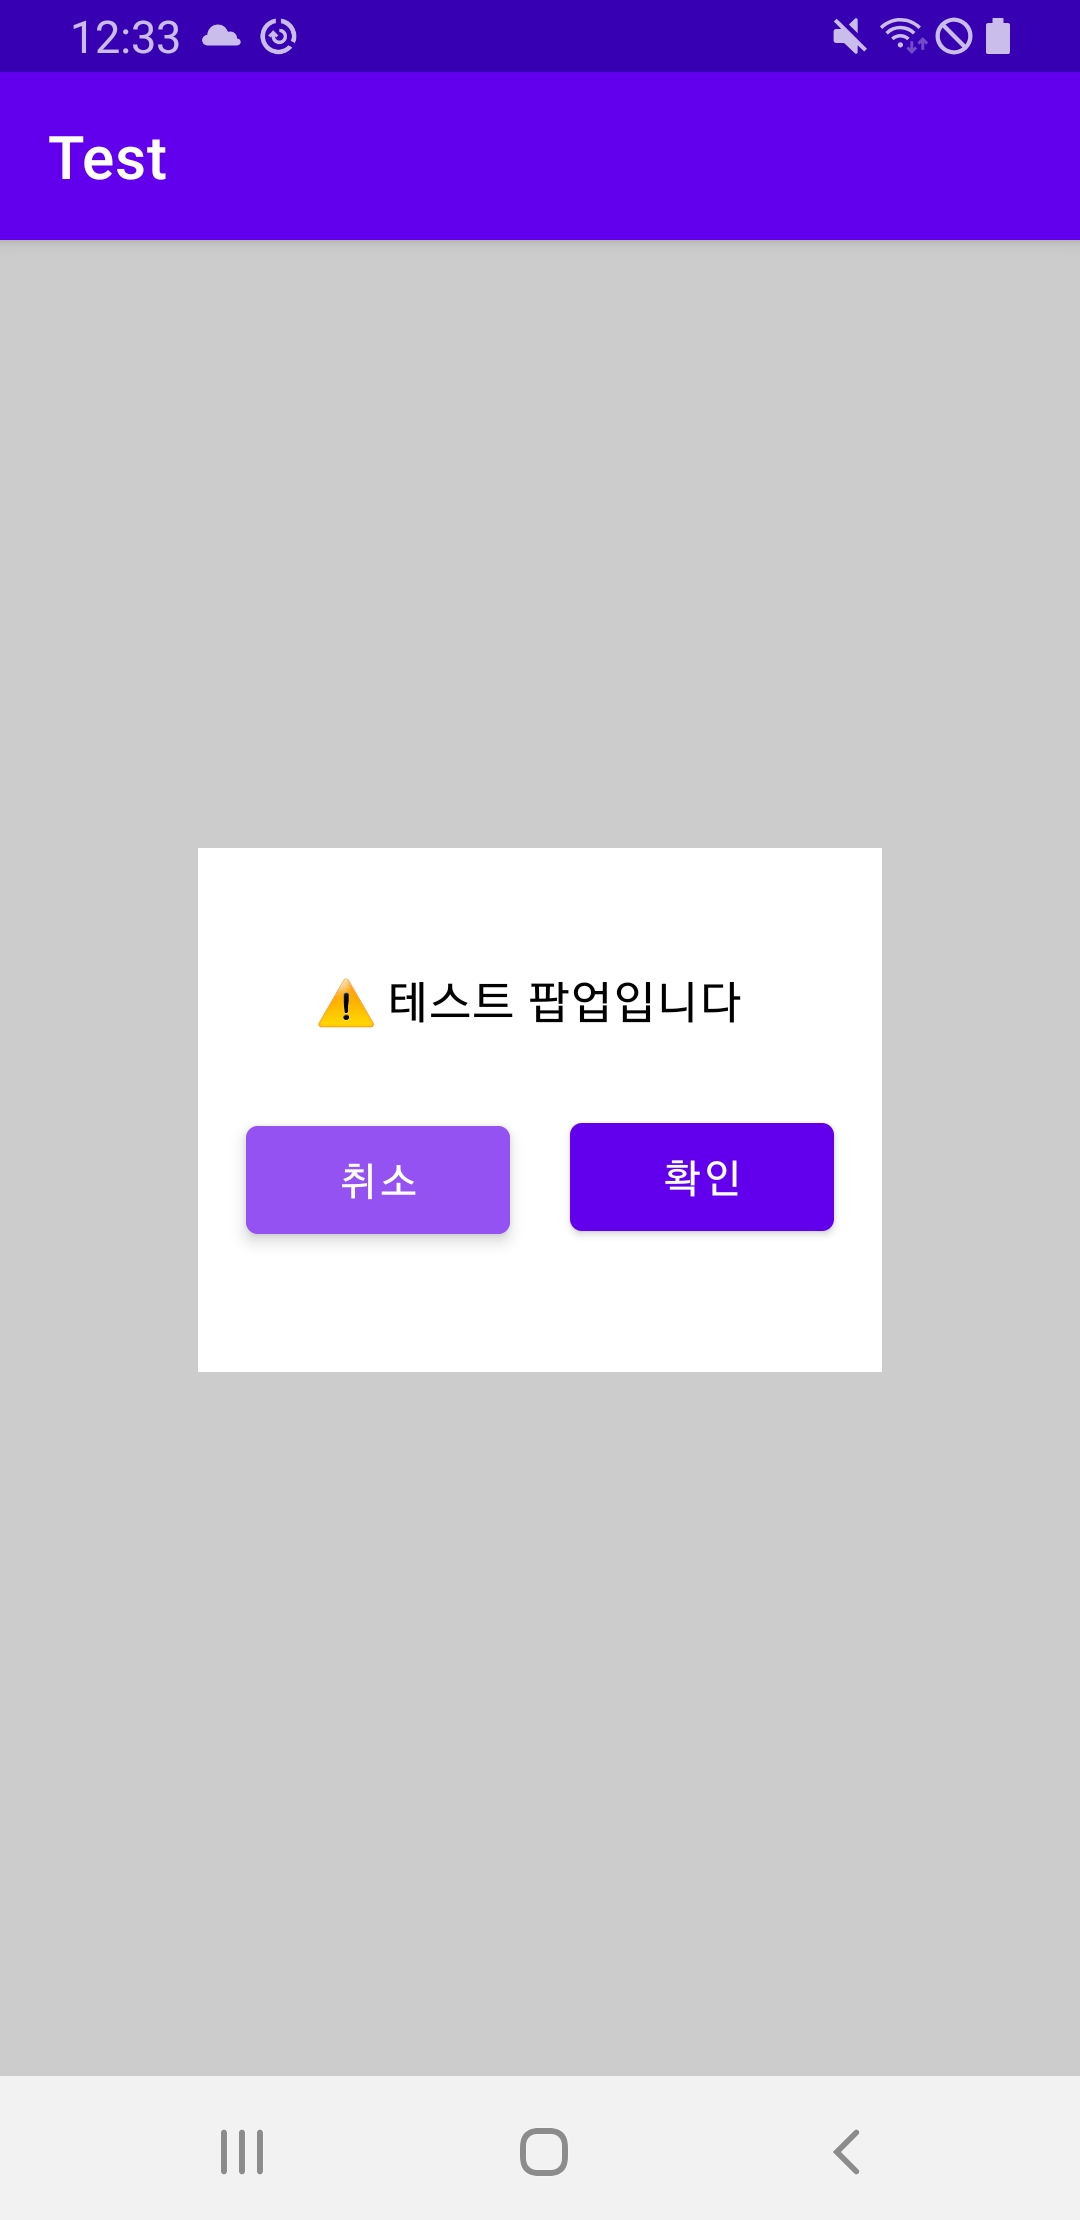
오늘은 LayoutInflater를 사용해서 PopupWindow를 만들어보겠습니다
팝업창을 만들고 사용자가 만든 레이아웃을 설정할 수 있고, 현재 Activity 최상단에 띄워집니다
그럼 PopupWindow를 간단하게 사용해보고 특징들에 대해 정리해보도록 하겠습니다
1. PopupWindow에 띄울 Layout 설정
간단한 예제로 아래 그림과 같은 TextView 1개, Button 2개로 구성된 레이아웃을 만들어보겠습니다

[text_popup.xml]
<?xml version="1.0" encoding="utf-8"?>
<LinearLayout xmlns:android="http://schemas.android.com/apk/res/android"
  xmlns:app="http://schemas.android.com/apk/res-auto"
  android:layout_width="wrap_content"
  android:layout_height="wrap_content"
  android:background="@color/white"
  android:orientation="vertical">

  <TextView
    android:id="@+id/tv"
    android:layout_width="wrap_content"
    android:layout_height="wrap_content"
    android:layout_marginTop="40dp"
    android:text="⚠ 테스트 팝업입니다"
    android:textColor="#000000"
    android:layout_marginLeft="40dp"/>

  <LinearLayout
    android:layout_height="wrap_content"
    android:layout_width="wrap_content"
    android:orientation="horizontal">

    <Button
      android:id="@+id/btnCancel"
      android:layout_width="wrap_content"
      android:layout_height="wrap_content"
      android:text="취소"
      android:layout_marginTop="25dp"
      android:layout_marginStart="20dp"/>

    <Button
      android:id="@+id/btnOk"
      android:layout_width="wrap_content"
      android:layout_height="wrap_content"
      android:text="확인"
      android:layout_marginTop="25dp" />
   </LinearLayout>
</LinearLayout>
2. xml을 view로 만들어줍니다
xml과 view를 만들어주기 위해선 LayoutInflate를 알아야합니다
여기서 LayoutInflate란 xml에 선언된 위젯들을 실제 View로 만들어주는 역할을 합니다.
var linear = LinearLayout(this)
var window = layoutInflater.inflate(R.layout.test_popup, linear, false)
public View inflate (int resourse, ViewGroup root, boolean attachToRoot)
resourse : 로드할 XML 레이아웃 리소스의 ID
root : View의 root
attachToRoot : View의 root로 만들지 (true) false일 경우 layoutparams만 전달
3. PopupWindow 보여주기
popupWindow.showAtLocation(window, Gravity.CENTER, 0, 0)바로 showAtLocation을 실행하게 되면 WindowManager$BadTokenException이 날 수 있기에 아래 링크의 방법을 참조하여 isFinishing을 추가해줍니다
2020/12/15 - [버그잡자 버그잡자 찍찍찍 🐹] - WindowManager$BadTokenException
그리고 showAtLocation(View parent, int gravity, int x, int y) 함수 원형에서 각 인자들을 살펴보면,
parent : 말 그대로 부모가 될 View
gravity : parent에 표시될 위치속성
x, y : x,y의 오프셋
으로 구성되어 있습니다. 각 표시될 속성과 오프셋을 정해서 인자로 넣어주면 됩니다.
gravity가 지정되지 않은 경우엔 x,y의 절대적인 위치에 표시되고 gravity가 지정될 경우엔 해당 view에서 상대적인 위치에 표시됩니다
이상으로 기본적인 PopupWindow 사용법과 LayoutInflater 사용법이였습니다
궁금하신 점이나 의견이 있으시면 댓글 부탁드립니다 감사합니다 😊
'📱 Android' 카테고리의 다른 글
| [Android] Notification (0) | 2021.01.04 |
|---|---|
| [Android] Timber 사용해보기 (0) | 2020.12.29 |
| [Android] getColor, getDrawable Deprecated 대응 (0) | 2020.11.18 |
| [Android] Firebase setCurrentScreen 지원중단 (0) | 2020.11.09 |
| [Android] 최신 Firebase Crashlytics Sdk 업데이트 (0) | 2020.11.05 |